


Stroms Grip-Guide. Professional drilling instructions. Eng
495 kr
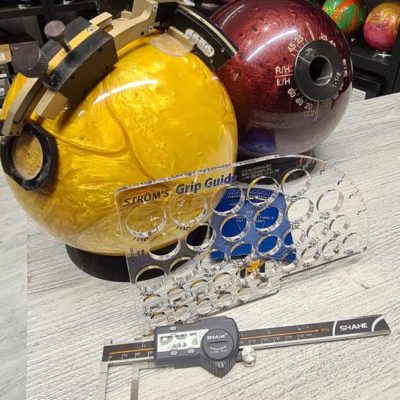
Grip-Guide (which can be purchased here) is an excellent tool that you can always carry with you if you work with bowling. You never know when you may need to measure a prospective customer. Now, for the first time, you do not have to answer that you can not or tell the prospective customer to visit the shop instead, when it suits you better and where you have your normal aids. Aids that are better, but which for practical reasons you can not always carry with you. Grip-Guide you can easily have in your pocket and measure everything you need, anytime, anywhere. If you cannot measure the customer directly, there is a great risk that the opportunity escapes from your and the customer may go to someone else. If you need an aid that a completely inexperienced prospective customer needs to measure their own hand when you are prevented from meeting due to distance, for example, then Grip-Guide is not only superior but also unique in its kind. I know that Grip-Guide works excellently as it was sent during the Corona times 2020-21 and contributed to me retaining and expanding my customer base during these difficult years.
Normally, if you are a trained ball driller, you have no problem converting your own, your bowlers, coaches or bowling alleys staff’s using Grip-Guide or similar aids to drilling instructions. You know how to drill your oval holes, angles, lengths etc. Then do as you usually do.
If you are unsure or inexperienced, you can choose the help tables Ströms Bowlingshop developed after more than 45 years as a ball driller. Anders Ström, the inventor of Grip-Guide, is trained at INTERNATIONAL BOWLING PRO SHOP & INSTRUCTORS ASSOCIATION. IBPSIA which is considered to have the best education in the world, an education that was at Storms Lucky Larsen’s Masters, Sweden’s first professional PBA competition, where Ströms Bowlingshop was responsible for the competition’s official Pro Shop and drilled 100s of balls to Jason Belmonte, Jesper Svensson, Liz Johnson and by more of the world’s best bowlers. In the official Lucky Larsen Masters Pro Shop, we also had IBPSIA training 2017. A three-day $1000 training that should be mandatory if you are a serious ball driller. Anders Ström also has training in the Bill Taylor Fitting Ring. Bill Taylor, who traveled around Sweden in the 80s, invented a similar tool, but which has its limitations in size and flexibility. Grip-Guide has everything BT has and more there and much smoother.
The professional instructions you can read about further down, are aimed at ball drills that are trained and know their job but insecure or inexperienced with Grip-Guides technology. Here you get access to normally locked pages that are valid for one year and may not be copied or distributed to others without permission from Ströms Bowlingshop.
A grip in a bowling ball usually consists of sizes of fingers and thumb, length between the fingers and thumb. Pitches on the holes and the ovality of the holes. All this can be measured and calculated with Grip-Guide. Even modern two-handed without a drilled thumb can also be easily measured, as can most exotic grips such as semi, drop-ring finger Sarge Easter, offset etc.
Supplementary instructions for trained and experienced ball drills.
- If you are used to similar plexiglass measuring tools, such as the Bill Taylor Fitting Ring, then you use Grip-Guide in a similar way.
- The difference is that Grip-Guide has more oval holes, more flexible size so you can always and should have with you so you are always ready to measure your customers' hands and sizes.
- Grip-Guide also has complementary software, similar to this page, so you can better understand and find the right length and pitches.
- Grip-Guide is also so simple that you can send it to customers along with instructions so that customers who are too far away can measure their hands themselves.
- Bowling alleys you work with should have a Grip-Guide so they can easily measure bowlers in their alley and order everything from new balls to inserts of the right size for their customers.
The length and pitches to be drilled in the ball are always converted in some way from the measuring tool you use to clean drilling instructions. So do as you usually do or use my tips including my help tables that come below.
GRIP LENGTH
Conversion, measured length of Grip-Guide to drilled cut to cut (c/c) length, conventional grip
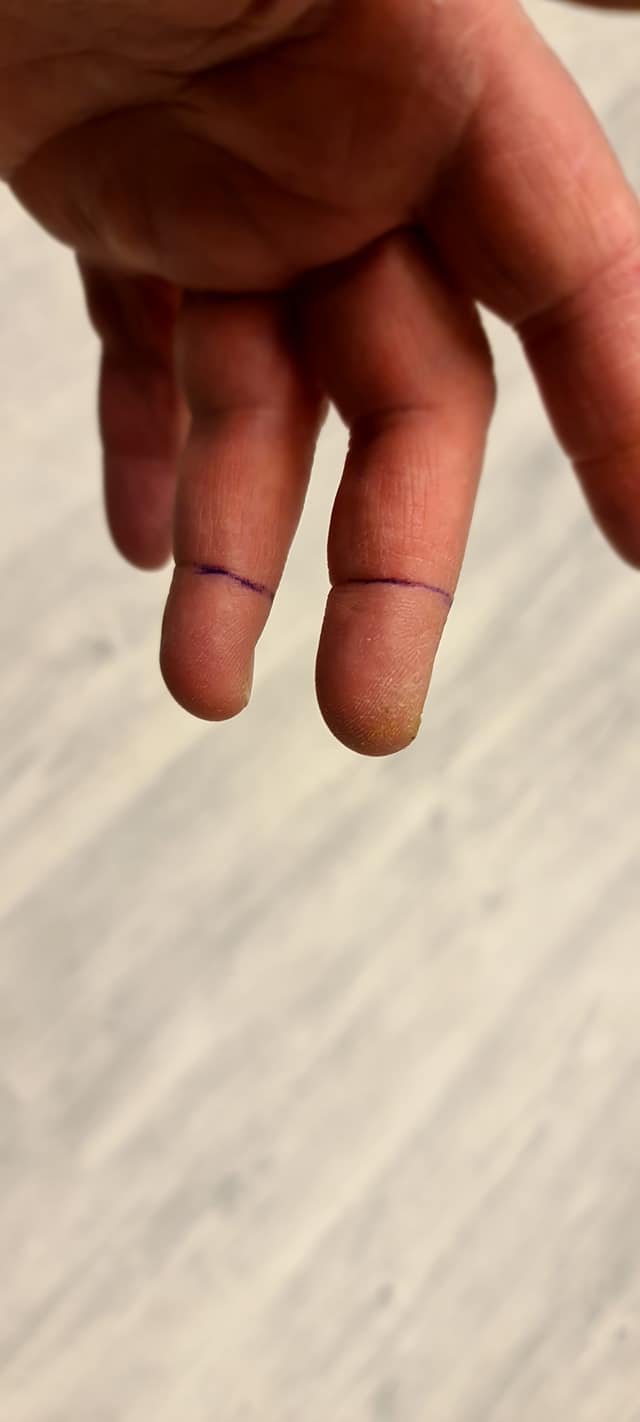
In conventional grip, the length is measured from Grip-Guide's green mark, the zero point, to the second line on the middle and ring finger. In the case of a conventional grip, the joint, ie where the second line is, should be in the middle of the respective hole and you may in the usual way convert the Grip-Guide length to the length you are then going to drill. Convert as you normally would or use this help table where measured length is converted to the correct cut to cut (c/c) length conventional grip.
Conversion, measured length of Grip-Guide to drilled c/c length, fingertip grip
The length to be drilled in the ball at the fingertip grip is calculated using the length measured from the Grip-Guide's green mark, the zero point, to the first line of the middle and ring finger. At fingertip, the joint should be 2/3 over the respective hole and you can in the usual way convert the length of the Grip-Guide to the length you then have to drill. Convert as you normally would or use this help table where measured length is converted to the correct cut to cut (c/c) length fingertip grip.
FINGER SIZES
Conversion table, hole size
Each hole on the Grip-Guide is drilled with the drill indicated on the Grip Guide. If it says 29/32, it is drilled with 29/32. Each Grip-Guide hole is then oval four 1/64 sizes larger, which is the average ovality of the thumb and fingers. So 29/32 on the Grip Guide is drilled 29/32 and oval to 31/32. As always, adjust as needed if the customer's fingers are more or less oval than these four sizes. Measure with calipers and test drill if you are inexperienced or unsure of the conversion Grip-Guide to drilling in the bowling ball. Just as you always do when working with new measuring tools. If the size 29/32 specified on the Grip-Guide is the one that feels right, you should drill with 29/32 and make the hole oval to size 31/32, ie four sizes larger at the right oval angle (see below). Here is a help table for all sizes from 1/2 to 1 1/16 oval to 1 1/8.
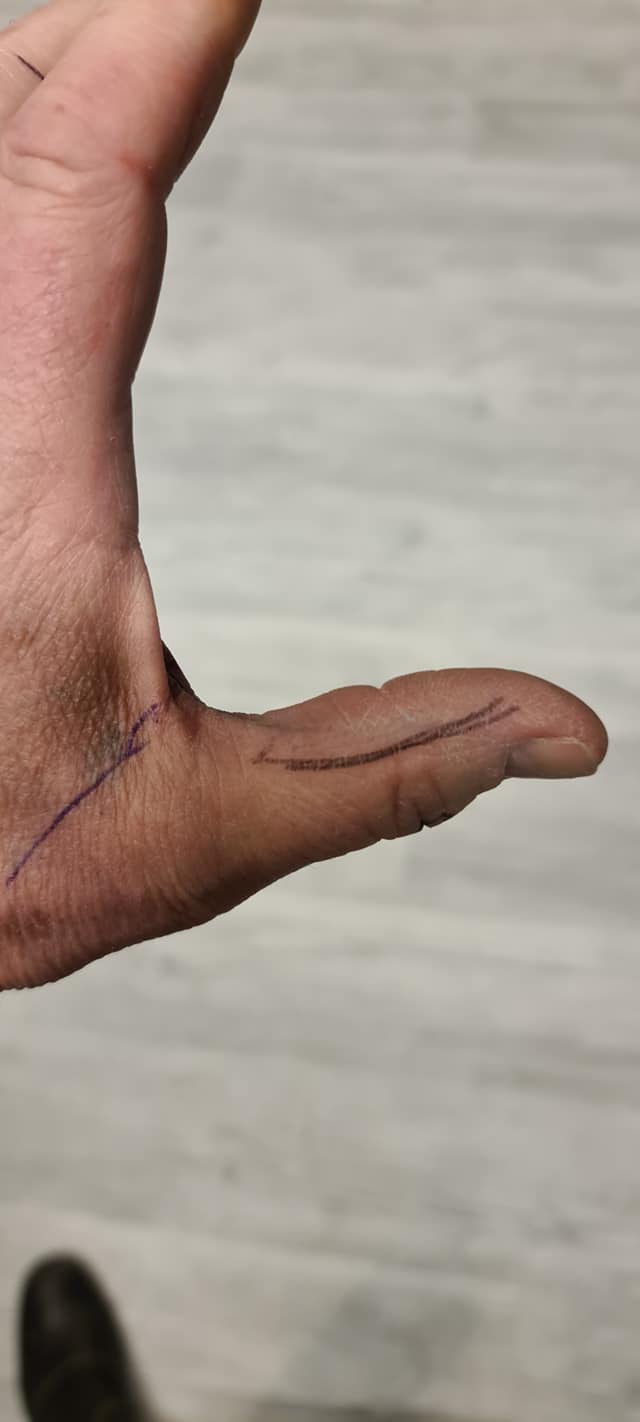
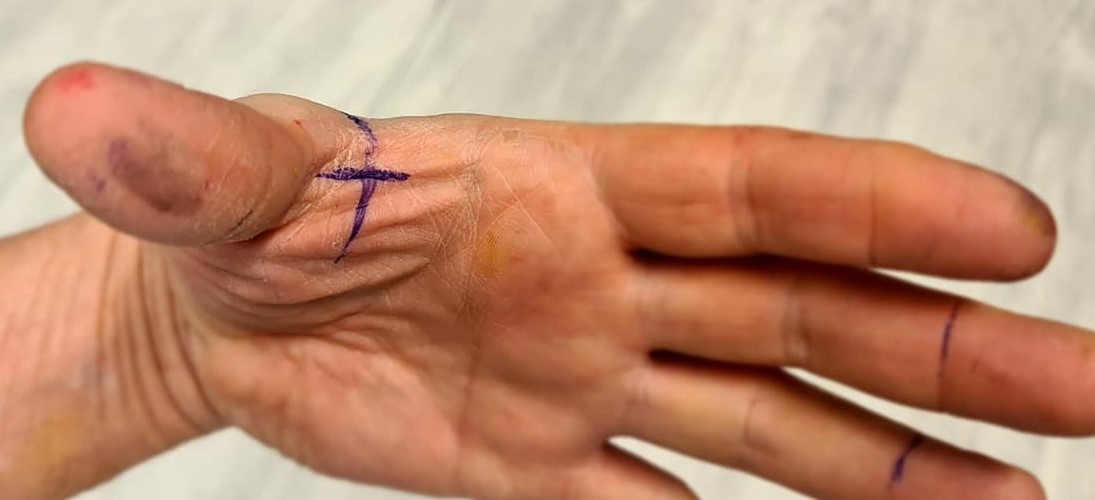
Help to assess the oval angle of the thumb
By drawing lines where the thumb is widest and where the thumb is against GG, you can assess the oval angle of the thumb. The picture here shows what it looks like from 0-90 degrees. 30-60 degrees is normal. In this film, you see the lines drawn on the widest sides of the thumb and the two lines drawn around the Grip Guide. When the thumb shows as in the movie, you can judge the oval angle of the thumb. The thumb on the film has a 45 class oval angle.
Finger inserts
It is very easy to convert Grip-Guide's moderate sizes to find the right finger insert sizes. For those who do not use the thumb, this is almost all that is needed to find the right grip. Together with the finger angles that depend on the flexibility of the fingers, you have everything you need for a two-finger player. Here is the help table for converting Grip-Guide's measured size to the correct inserts.
PITCHES
Pitches on the holes
The side pitches of the holes are judged on film or directly on the fingers. Do as usual and give the customer the side pitches the fingers should have considering what they look like and if the customer has injuries to the side of the fingers or thumb.
The pitches forward and reverse on the finger and the thumb holes are determined by what length it is, whether it is conventional or fingertip and how flexible the fingers are. If you measure the customer yourself, you check the flexibility of the joints in the usual way. If the customer flexes his hand himself, notice how much the customer can fold in and stretch. Here you see a film with guides to make it easier to assess the flexibility of the fingers. Ströms Bowlingshop recommends pitches in my help tables below on the holes for all lengths, adapted to the flexibility of the hand. If it is very stiff, stiff normal, flexible or very flexible. Help table for the thumb pitches. Help table for finger pitches conventionally. Help table for the finger pitches fingertip.
MEDIA LIBRARY
Help tables
Measured length on Grip-Guide converted to the correct cut to cut (c/c) length conventional grip.
The measured length of the Grip-Guide is converted to the correct cut to cut (c/c) length of the fingertip.
Dimensions from Grip-Guide correspond to these drills and ovality.
Finger insert sizes from Grip-Guide measurement.
Thumb pitches depending on length and flexibility of fingers.
Finger pitches conventionally depending on length and flexibility of fingers.
Finger pitches fingertip depending on length and flexibility of fingers.
Videos
Video for the entire measurement procedure
Video with guides to make it easier to assess the flexibility of the fingers
Video to assess the oval angle of the thumb
Video, length measurement Grip-Guide
Laser production of Grip-Guide
Pictures
The ovality angle of the thumb
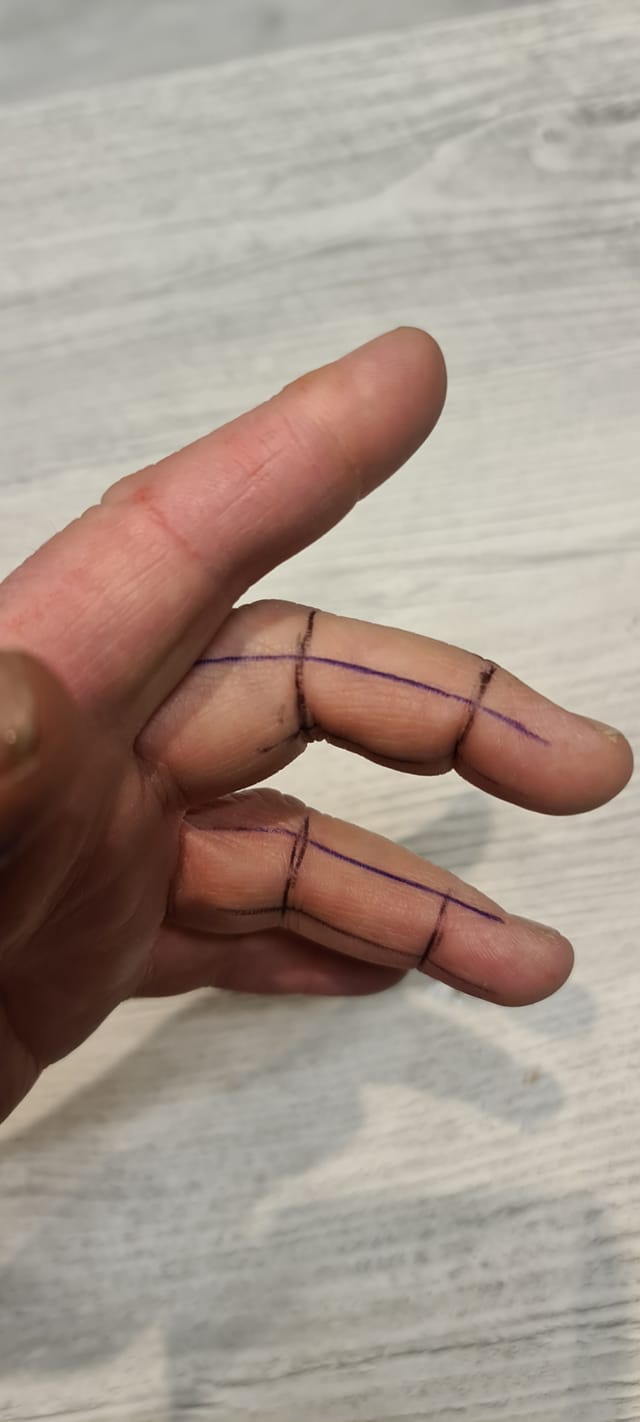
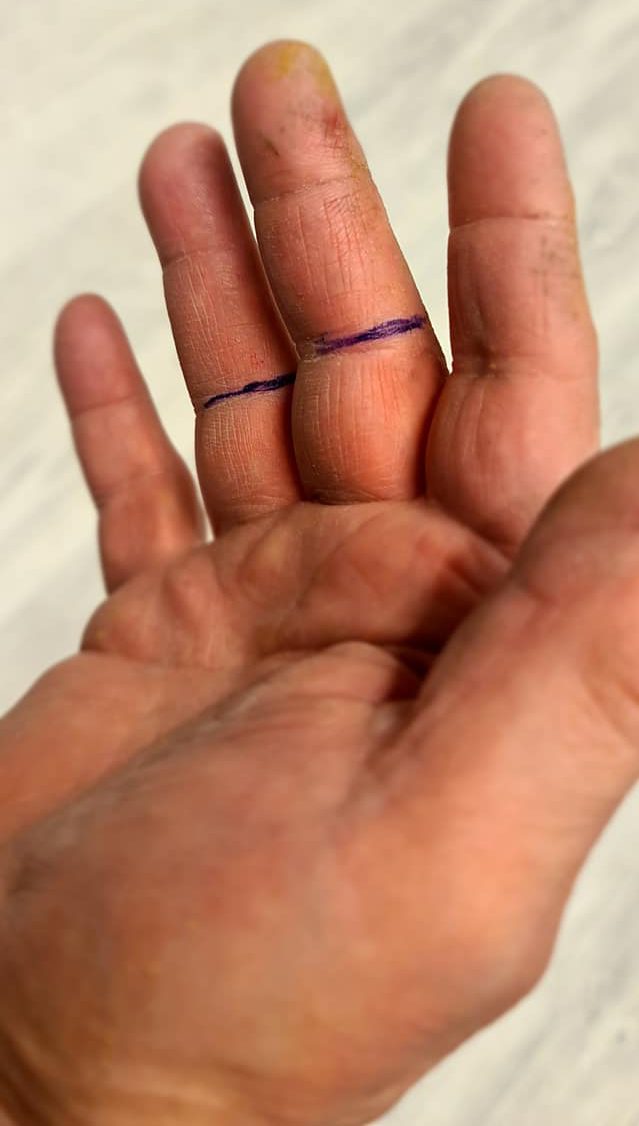
Lines on fingers
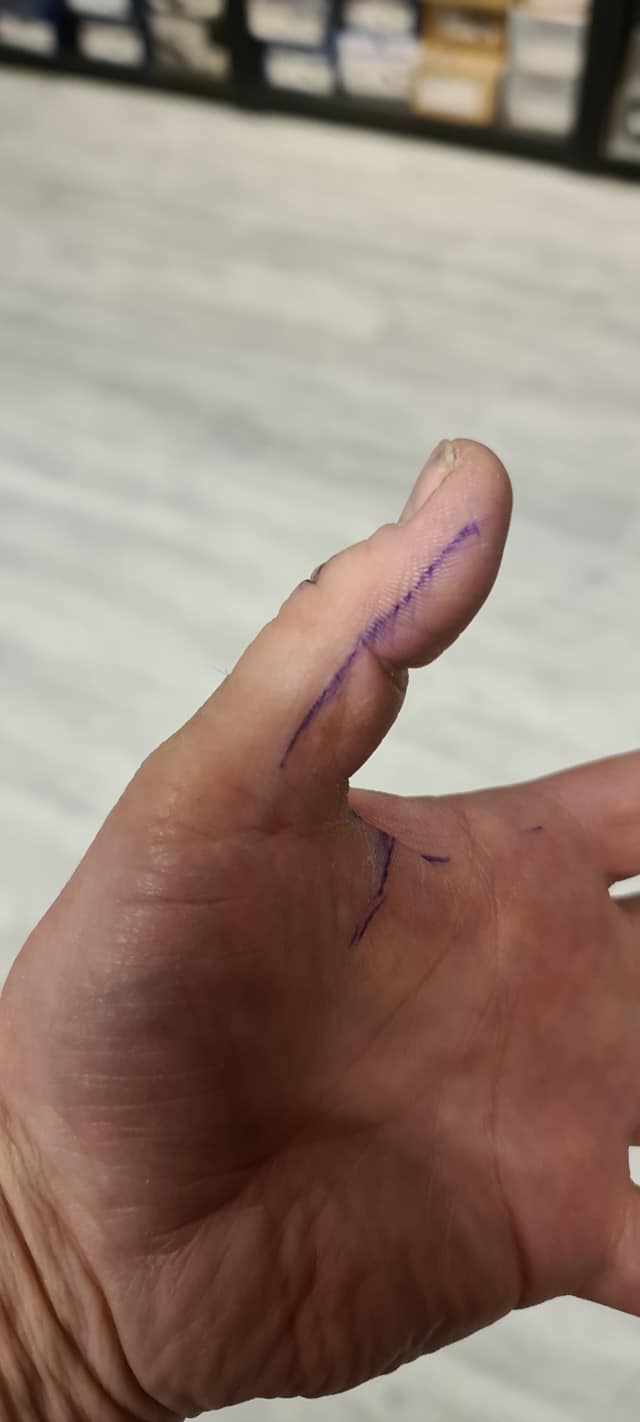
Lines on the thumb inside
Lines on the thumb outside
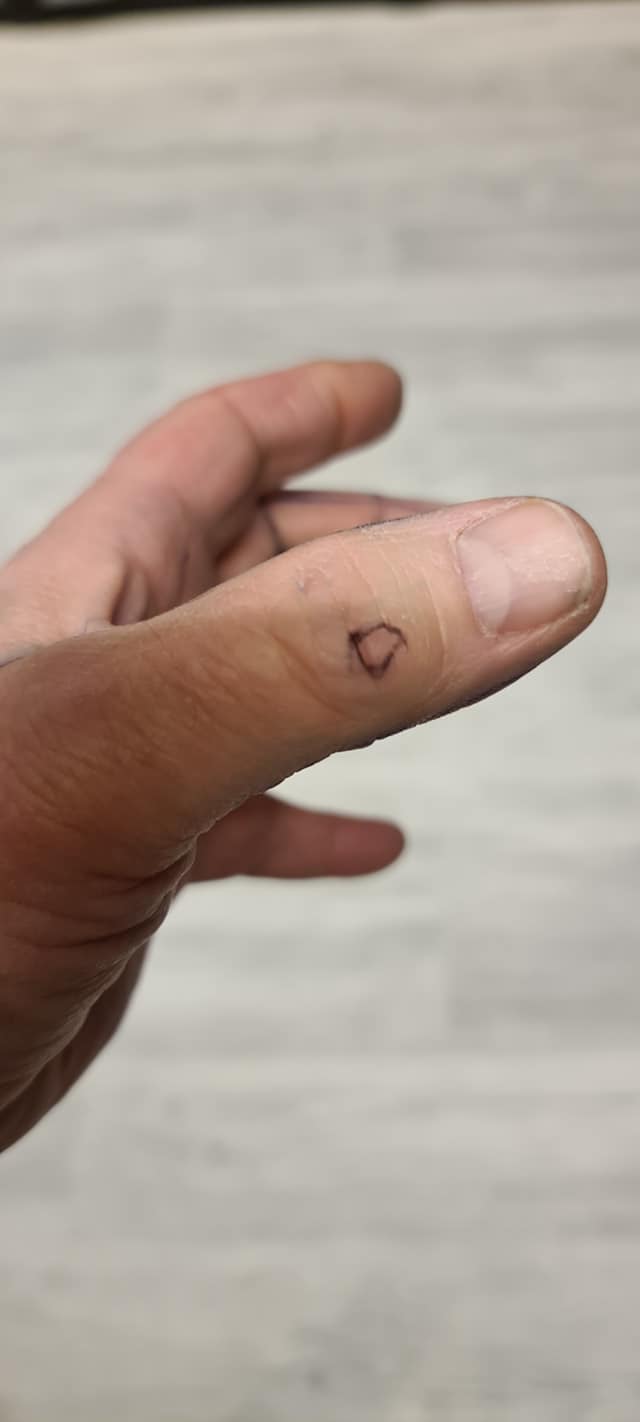
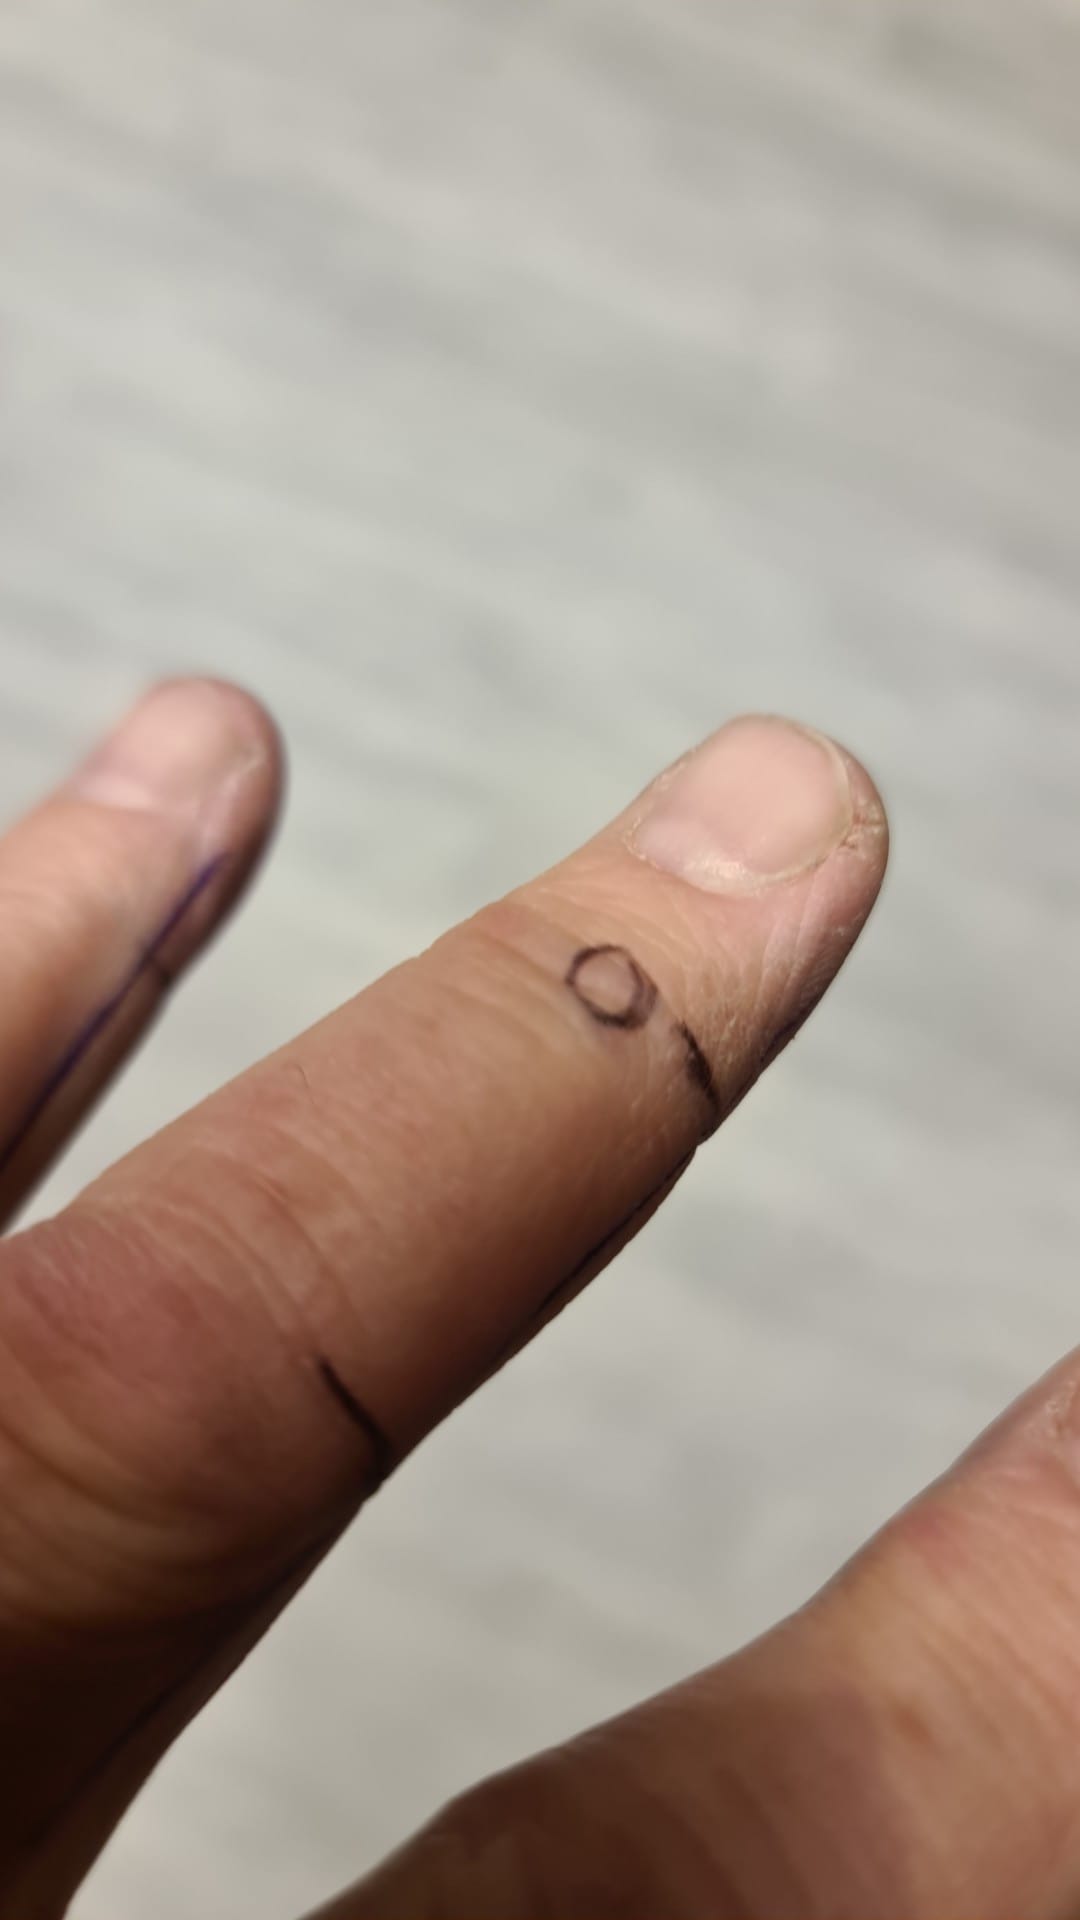
Marking on injuries thumb
Marking on injuries fingers
Zero lines, the inside of the thumb
Grip-Guide at zero point, inside the thumb
Lines fingertip
Lines conventional
Green zero point
Grip-Guide
Relaterade produkter
-

Ströms Bowlingshops Live Web Grundkurs i bowling
1 995 kr – 3 990 kr1 995 kr – 3 990 krGrundkurs Grundkurs plus två valfria fortsättningskurserThis option is required -
Ströms Bowlingshop
Stroms Grip-Guide. Measure yourself. Eng
-
Ströms Bowlingshop
Stroms Grip-Guide. Professionella borrinstruktioner. Sv
495 kr